Quick Answer #
Gift Registry Guru automatically adds the Add to Registry button below the Add to Cart button on your product page once the app is installed (Method 1: Auto Inject). If you don’t see the button, or want to move it to a different spot on the page, switch to Manual mode in your Gift Registry Guru dashboard and place the Add to Registry block using the Shopify Theme Customizer (Method 2).
An Add to Registry button lets shoppers add products directly to a gift registry while they browse — making it easier for friends and family to find and purchase exactly what they want. Showing this button clearly on your product page is one of the simplest ways to boost registry sign-ups, gift list completions, and repeat visits to your store.
With Gift Registry Guru, you don’t need any coding knowledge to display this button. Below, we’ll walk you through the two easiest ways to show the Add to Registry button on your product page.
Method 1: Auto Inject (Default Setting) #
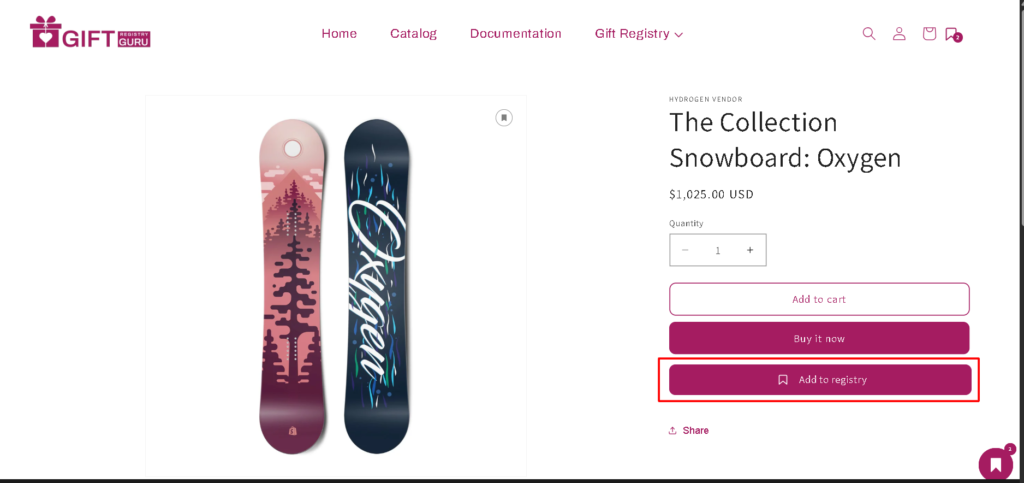
Auto Inject is the default placement method in Gift Registry Guru, designed to get your store up and running with zero setup. When this is turned on, the Add to Registry button is automatically placed directly below the Add to Cart button on every product page across your theme.
To check or change this setting:
- Log in to your Gift Registry Guru dashboard.
- Scroll to the ADD TO Registry Button on Product Page
- Confirm that Auto Inject is selected as your placement method.
- Preview your storefront — the Add to Registry button should now appear just below Add to Cart on any product page.

This option works well for most Shopify themes right out of the box and requires no developer involvement, making it the recommended starting point for new merchants.
Method 2: Manual Placement Using Theme Customizer #
If your theme doesn’t display the Add to Registry button automatically, or if you’d like to reposition it elsewhere on the product page, switch to Manual mode and use the Shopify Theme Customizer to drag and drop the button block exactly where you want it.
Step 1: Switch from Automatic to Manual
In your Gift Registry Guru dashboard, go to Settings > Button Placement and select Manual instead of Automatic.

Step 2: Open the Theme Customizer
After selecting Manual, a Configure Button option will appear. Click it to launch the Shopify Theme Customizer.
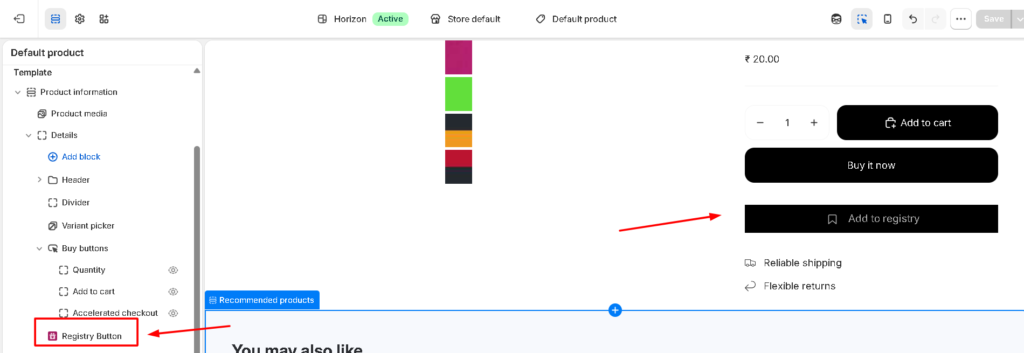
Step 3: Add the Add to Registry block
Inside the Theme Customizer, navigate to your Product Information (or Product Details) template. Add the Add to Registry Button block from the app block list, then drag it to your preferred position — above the price, beside Add to Cart, near product variants, or anywhere else that fits your design.
Step 4: Save your changes
Click Save in the Theme Customizer. The Add to Registry button will now appear in your chosen location on your live storefront.
Customizing the Button Appearance #
Once your Add to Registry button is visible, you can adjust its text, color, size, icon style, and alignment to match your brand. Learn more in our guide on customizing the Add to Registry button.
Changing the Button and Notification Text #
You can also update the wording shown on the button and in registry confirmation notifications — useful for matching your store’s tone of voice or supporting multiple languages.
- From your Gift Registry Guru dashboard, go to General Settings.
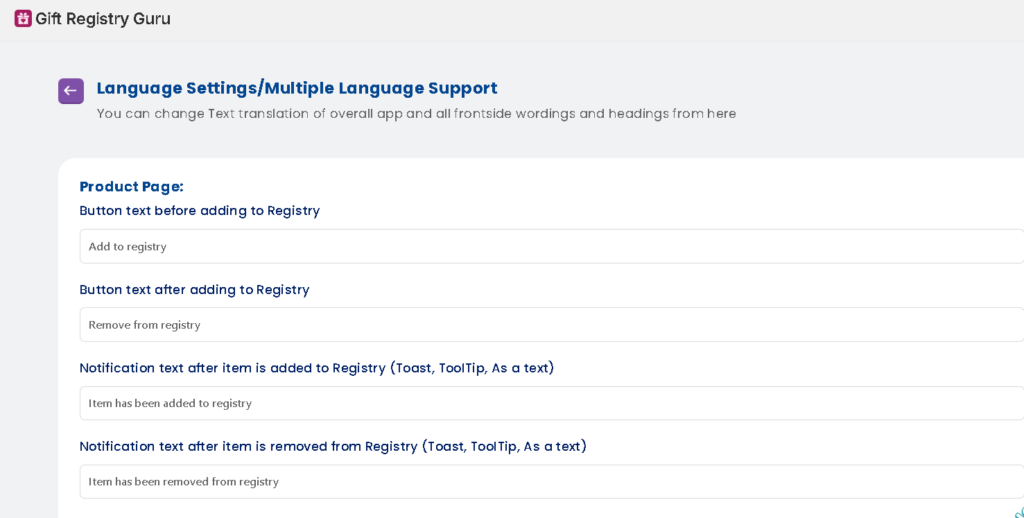
- Open Language Settings / Multi-Language Support.
- Click Edit Settings, then choose Manage Storefront Languages.
- Select the language you’d like to edit and click Edit Translation.
- Locate the Product Page section to update the Add to Registry button label and related notification text.
Frequently Asked Questions #
Why isn’t the Add to Registry button showing on my product page?
This usually happens when your theme doesn’t support Auto Inject or when the app embed is disabled. Switch to Manual mode (Method 2 above) and add the Add to Registry Button block through the Shopify Theme Customizer.
Can I move the Add to Registry button to a custom position, like above the product images?
Yes. You can show the registry icon or button above the product image; follow this article.
Does enabling the Add to Registry button require coding?
No. Both Auto Inject and the Theme Customizer method are fully no-code and can be completed directly from your Gift Registry Guru dashboard and Shopify admin.
Will the Add to Registry button placement apply to all products automatically?
Yes. Once enabled through either method, the button placement applies storewide across all product pages using your active theme.
How long does it take for changes to appear on my live store?
Auto Inject changes apply immediately. Manual placements via the Theme Customizer apply as soon as you click Save, and are visible right away on your live storefront.


