Quick Answer #
To add the Gift Registry icon to your store header, go to your Gift Registry Guru Dashboard > Registry Icon Location > Configure, then select “Add to your header as icon” and click Save. Once enabled, you can customize the icon’s style, color, size, counter badge, and position to match your store’s design.
Adding a Gift Registry icon to your store header gives shoppers instant, always-visible access to their registry from any page on your store — making it easier for them to manage their list and for gifters to find it. With Gift Registry Guru, enabling and customizing the header icon takes just a few clicks with no coding required.
How to Enable the Gift Registry Header Icon #
- Go to your Gift Registry Guru Dashboard.
- Scroll down to find the Registry Icon Location section.
- Click Configure.
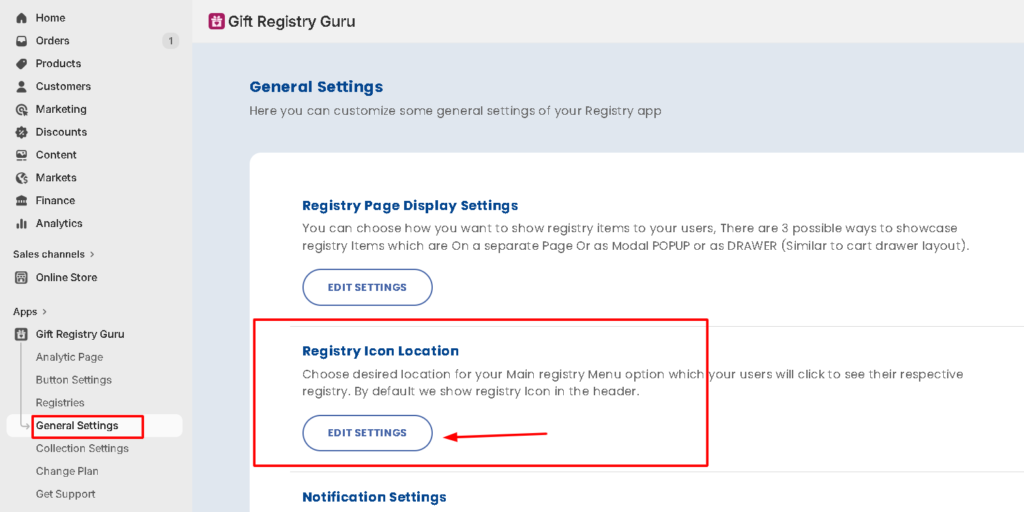
- You will be taken to the General Settings page with the icon location options.
- Select “Add to your header as icon”.
- Click Save (top right corner) to apply the changes.
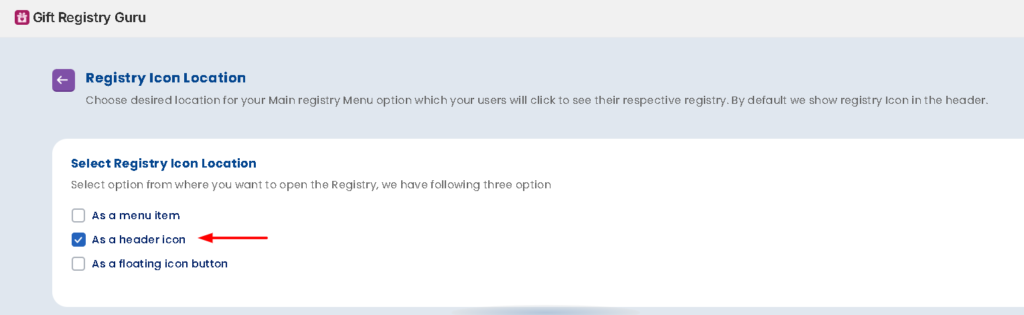
The Gift Registry icon will now appear in your store header, giving shoppers quick access to their registry from anywhere on your site.
Customization Options for the Header Icon #
Once the header icon is enabled, you can customize its appearance to match your store’s branding. All options are available in the same General Settings page.
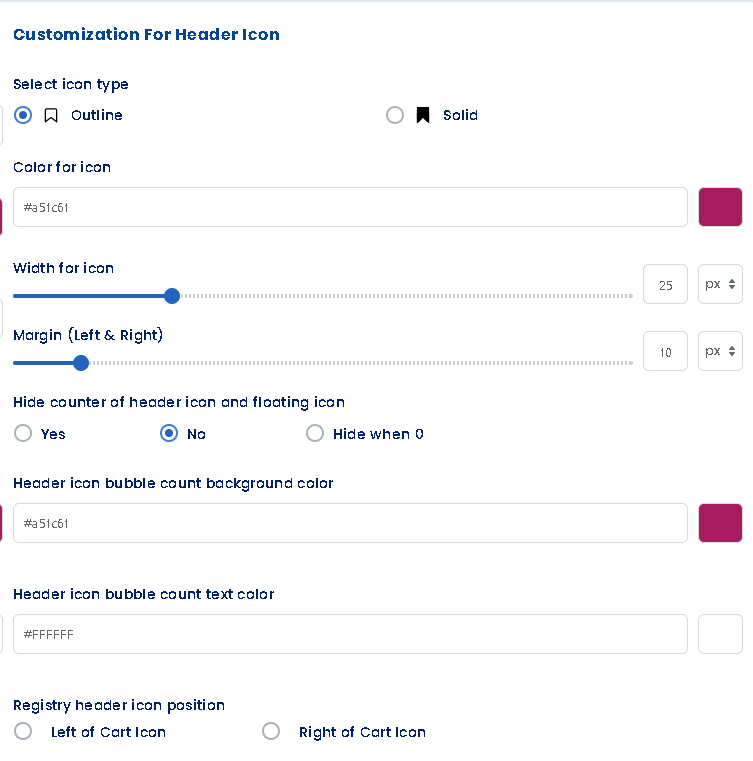
1. Select Icon Type Choose between an outline or solid icon style for the registry icon.
2. Color for Icon Set the registry icon color using a hex code to match your store’s color palette.
3. Width for Icon Define the icon’s width in pixels to make it larger or smaller depending on your header layout.
4. Margin (Left & Right) Set horizontal spacing around the icon to control how much space sits between it and adjacent header elements like the cart icon.
5. Hide Counter of Header Icon Toggle to show or hide the registry item count badge displayed on the header icon. When enabled, shoppers can see at a glance how many items are in their registry.
6. Header Icon Bubble Count Background Color Set the background color for the counter badge (the small circle showing the registry item count).
7. Header Icon Bubble Count Text Color Set the text color inside the counter badge.
8. Registry Header Icon Position Choose the icon’s position relative to the cart icon or other header elements. Options include positioning it before or after the cart, or hiding it from specific areas.
Note: Click Save in the top right corner after making any customization changes to apply them to your live storefront.
Frequently Asked Questions #
Where do I find the option to add the Gift Registry icon to the header?
Go to Dashboard > Registry Icon Location > Configure, then select “Add to your header as icon” and save.
Can I show a registry item count on the header icon?
Yes. The counter badge shows how many items a shopper has in their registry. You can toggle it on or off, and customize the badge background color and text color to match your theme.
Can I change the position of the registry icon in the header?
Yes. Use the Registry Header Icon Position setting to control where the icon appears relative to other header elements such as the cart icon.
Do I need to know code to add the registry icon to the header?
No. The entire setup is done through the Gift Registry Guru dashboard and requires no code editing.
Will the header icon appear on all pages of my store?
Yes. Once enabled, the header icon appears on every page of your store, giving shoppers access to their registry at all times.


